GEAR
3D-printed uneven edge that holds 120 kg
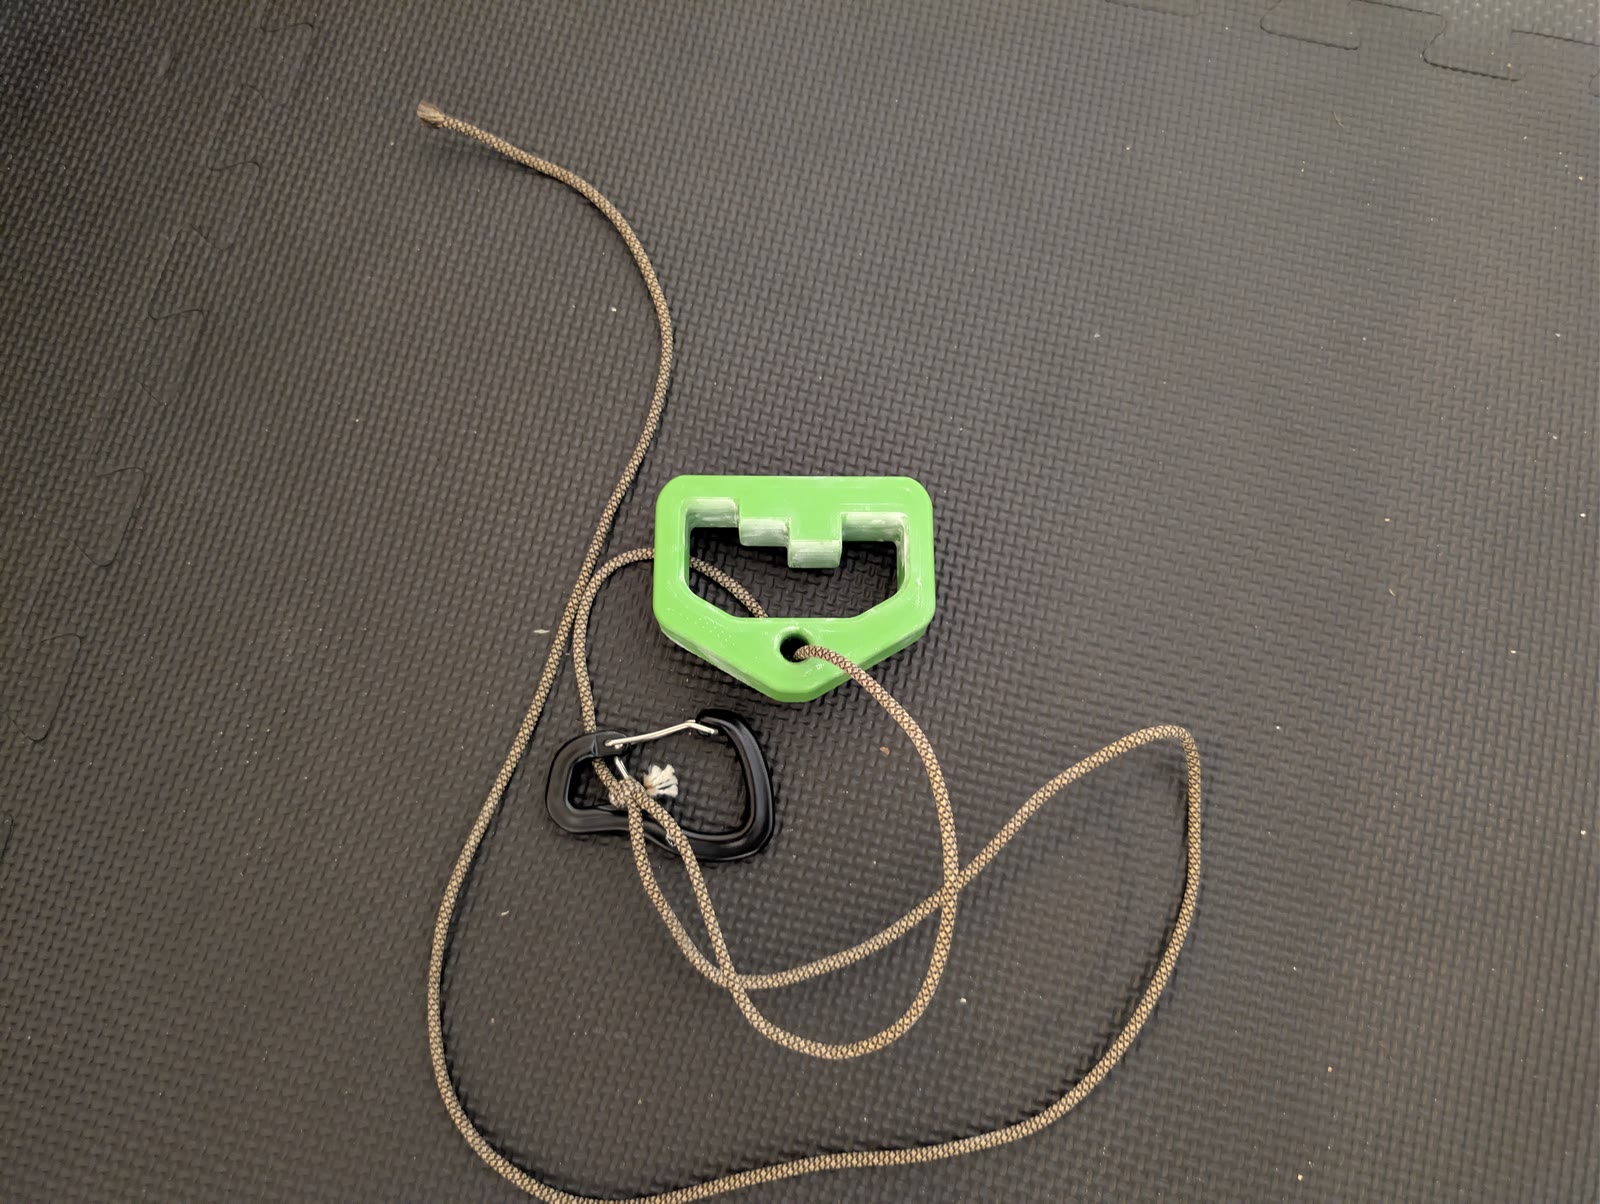
An uneven-height climbing edge from a free Printables model. A few weeks of use, plus the print settings that carry 120 kg: 6 walls, 50% infill, PET-G.
Download link
https://www.printables.com/model/1197645-climbing-fingerboard-uneven-edge
A few weeks in
I have been using it for a few weeks and so far I have no urge to go back to a flat edge. The uneven heights on this off-the-shelf Printables model are not a perfect fit for my hands, and even so the ergonomics and comfort — under heavy load and in concentric curls alike — are far better than on a flat edge. I feel the difference most in the usually overloaded middle finger and in the inactive pinky.
You can work maxes on it, though it is more productive to train half crimp with sets of 3–8 reps at a relatively high RPE.
The downside is the missing back wall, so finger placement — and with it the difficulty — can drift a little between sets.
Sample session
Half crimp:
  x1@8
  3x5^@8            (start at RPE 8)

Finger curls:
3x8@10 + 3x3 myo repsx1@8— one rep at RPE 8, two reps in reserve.3x5^@8— three sets of 5. Pick a load that puts the first set at RPE 8 and keep it for all three; the later sets climb on their own.3x8@10— three sets of 8 to failure.3x3 myo reps— once you hit failure, take 3–4 breaths and add more reps. Here, three such clusters of 3.
Print settings
Perimeters (walls)         6
Top / bottom solid layers  6 / 6
Infill                     50%
Nozzle                     0.4 mm
Material                   PET-G
Supports                   none
Orientation                lying on its side face
Where to get the file
printables.com/model/1197645The download holds one file, Uneven Edge.stl. It is ready to print as is — you just need the
right hardware and software.
The long version
Printing detail you can skip if you own a printer and know how to drive it.
Downloading the file
The model is Climbing Fingerboard Uneven Edge by Ehwar, published on Printables in February 2025 under a Creative Commons Attribution — Noncommercial licence.
Printables requires a free account to download. Once you are logged in, the model page has a Download button; with a single STL it comes down directly, without being zipped.
Printables packages come in two formats. .stl is geometry alone — a triangle mesh with no
settings, which you orient and slice yourself. .3mf also carries the designer’s print profile:
material, layer height, infill, sometimes a colour split. This model ships as STL only, so every
parameter in the section above is set by hand.
Slicing it
A slicer turns the solid into nozzle paths. PrusaSlicer, OrcaSlicer, Bambu Studio and Cura are all free and all handle this model. The same settings go by different names in each:
| What you set | PrusaSlicer / OrcaSlicer | Bambu Studio | Cura |
|---|---|---|---|
| 6 walls | Perimeters | Wall loops | Wall line count |
| 6 top and bottom layers | Top / bottom solid layers | Top / bottom shell layers | Top / bottom layers |
| 50% infill | Fill density | Sparse infill density | Infill density |
| Gyroid | Fill pattern | Sparse infill pattern | Infill pattern |
Leave layer height at the default 0.2 mm. A thinner layer adds half again to the print time and contributes nothing on this shape.
Which printer
Any FDM printer with a 0.4 mm nozzle will do. The model is 25 mm wide and fits any bed, including the 180 × 180 mm of the smallest machines. PET-G prints without an enclosure — that becomes useful with ABS and ASA.
At these settings this is a print of a few hours and a few dozen grams of filament, so a couple of euros of material. The rest of the cost is machine time.
Material
PET-G is the default choice here. It takes cyclic loading, survives hitting the floor and only softens around 80 °C.
PLA is stiffer and would hold up much the same in a short test. The problem shows up under load held over time: PLA creeps, deforming slowly under constant force, and softens as low as 55–60 °C. An edge hanging in a hot room in summer is a real scenario.
ABS and ASA buy higher heat resistance at the cost of a harder print — without an enclosure they warp and delaminate exactly where you do not want it.
Carbon-filled nylon is stronger than anything above and needs dried filament and a hardened nozzle. For a 120 kg edge that is overkill.
One setting that is easy to miss: turn the cooling down for PET-G. The fan chills a layer before it can bond to the one below, and load capacity rests on that bond.
No printer
Order the print from a print-on-demand service or a local makerspace. Their defaults are typically 2–3 walls and 15% infill, so the parameters have to be stated explicitly in the order: material, wall count, infill percentage and orientation on the bed. A print in the default configuration looks identical and cracks on the first heavy attempt.
Mounting and inspection
The edge hangs on paracord threaded through the hole, clipped with a carabiner into a loading belt or a sling with plates. Check the knot before every session.
Hold the print up to the light every once in a while and look for cracks running along the layer lines — that is where parts like this give way. A crack at the edge of the hole ends that specimen’s life; a reprint costs a couple of euros and a few hours.
FAQ
Will a print really hold 120 kg? At 6 walls, 50% infill and PET-G in this orientation, yes, with margin. A print at the slicer’s defaults is a completely different part in the same shape.
Is PLA good enough? For sets here and now, yes. For gear that hangs loaded and stays on the wall for a season, PET-G is the safer call.
Are supports needed? No. The designer shaped it to print support-free in the orientation the STL arrives in.
Is this beginner gear? An uneven-height edge takes some load off the middle finger and passes it to the pinky. The grip itself stays just as demanding, so early seasons of climbing are still better spent on the wall before loaded finger training gets added on top.
How does it compare to a wooden edge? Wood is warmer in the hand and less slippery on sweaty skin. A print costs a couple of euros, gets you a contoured shape you cannot buy in a shop, and can be repeated at any time.
Fitting it into training
An uneven edge changes how force is distributed across the fingers. The plan stays the same: load governed by rep count and RPE, scheduled around climbing so heavy fingers do not land right before limit bouldering. I wrote that up separately in the piece on edge lift RPE protocols.
Finger strength is only one variable in this. The wrist, elbow and shoulder girdle decide how much of it actually reaches the hold, and overuse in that region accumulates over years. That is what I work on in person — strength and conditioning for climbers in Gdańsk and the Tricity area, with an assessment before the first cycle.